
When performing maintenance on the machine, be sure to wear commercially available
goggles, gloves, and a mask.
Scope
This applies to RICOH Ri 1000 printers.
Symptoms/ When To Replace
This part should be changed when prompted by the part replacement warning due
to the life count for the part
Supplies
Fan Filter
WARNING:
Be sure to wear an anti-static grounding strap when handling any circuit board
components.
Before you Begin
Do NOT install part(s) until you have completed the following:
- Read this document and all accompanying documentation for this printer before
use. - Contact your Ricoh supplier prior to installation if any information is unclear or if you have any questions.
- Follow all safety precautions as outlined by the user manual, and this manual and quick
installation guide as well as the following general guidelines: - Avoid contact with any sharp edges that are exposed during part installation
process. - Ensure that the main power switch in the back is turned off until installation is
complete and disconnect the power cord from the machine. - Ensure proper grounding via straps when handling any electrical components.
- Keep all components, especially any electrical components, dry during
installation. - Double-check that no components have been inadvertently exposed to ink
(via splash/spill/etc.).
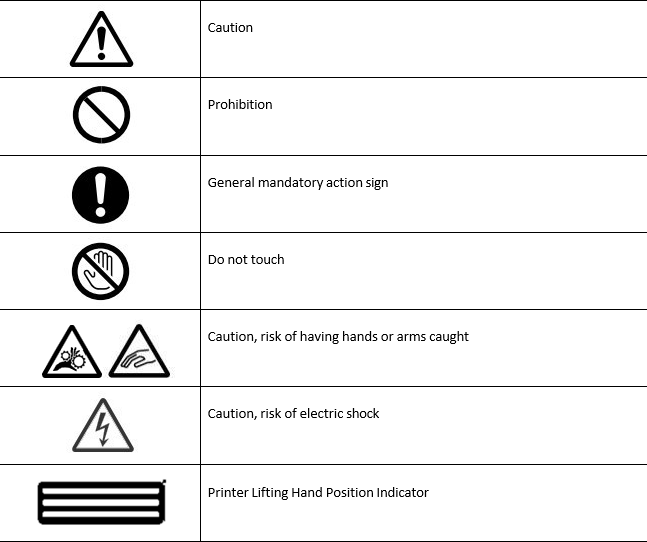
Safety Symbols for This Machine
The meanings of the safety symbols for this machine are as follows:
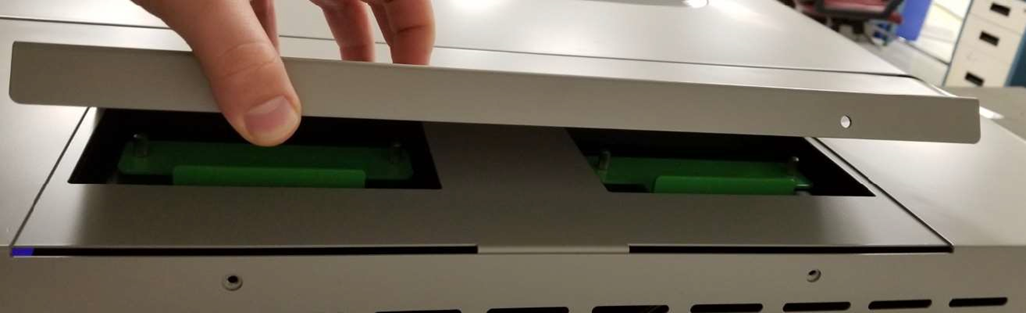
1. Remove the (2) thumb screws holding the fan filter cover in place
2. Remove the lid of the fan filter cover by lifting up and sliding out
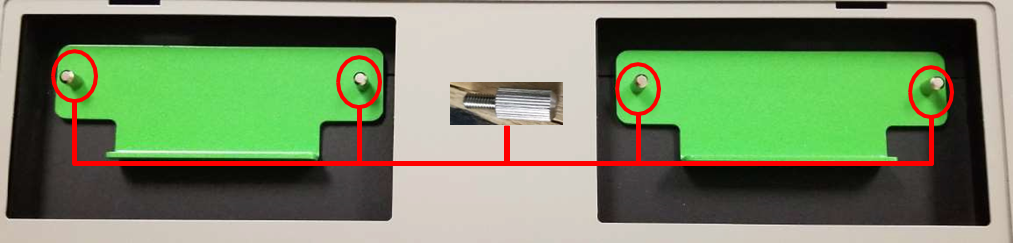
3. Remove the (2) thumb for each fan filter

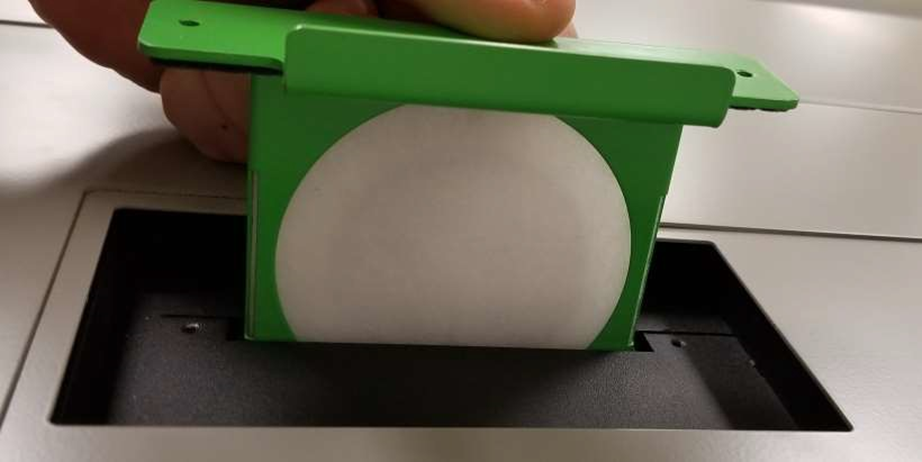
4. Lift the fan filter holder out of the printer

5. Remove the Fan filter from the holder
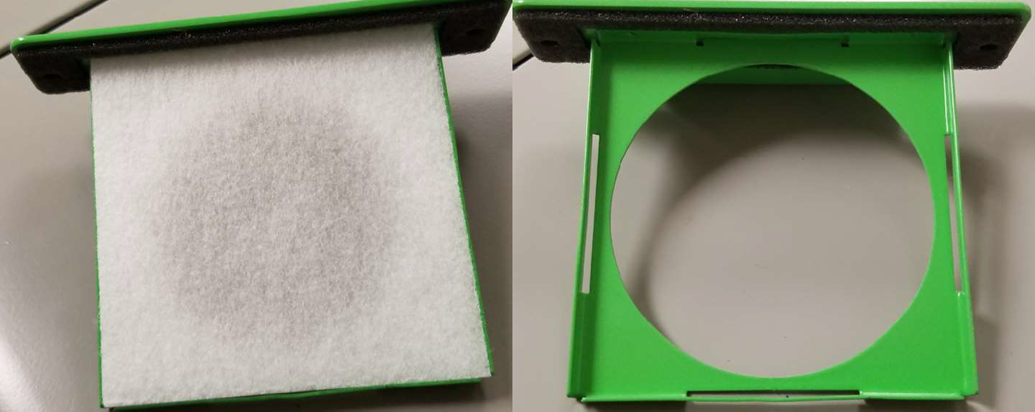
6. Place the new filter into the filter holder
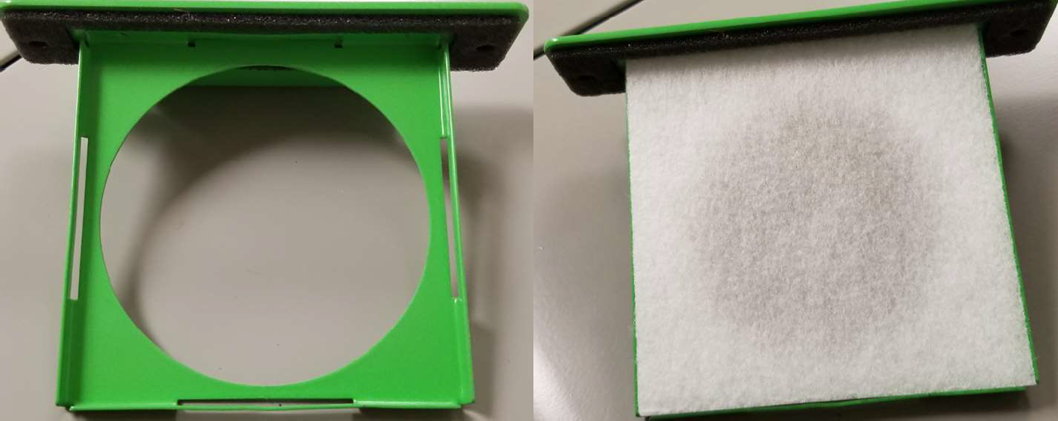
7. Insert the filer holder back into its respective slot
8. Screw in the (2) thumb for each fan filter
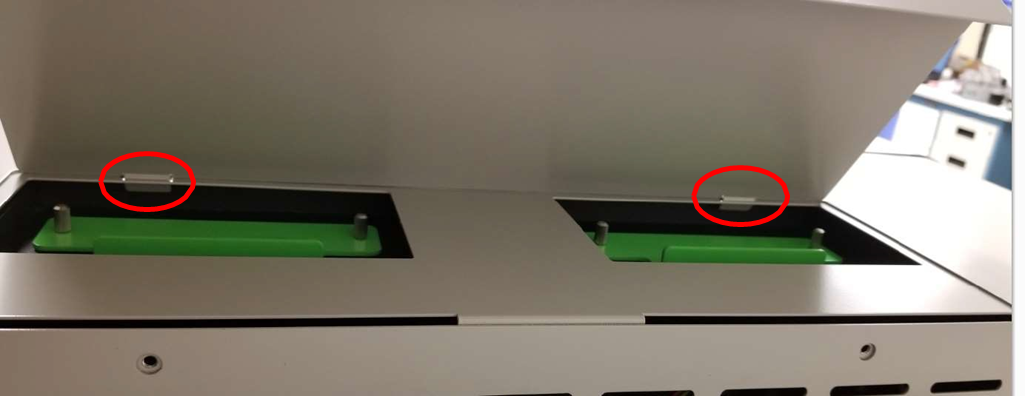
9. Insert the fan filter back into the top cover, making sure the tabs go into their
slots
10. Screw in the (2) thumb screws holing the fan filter cover in place
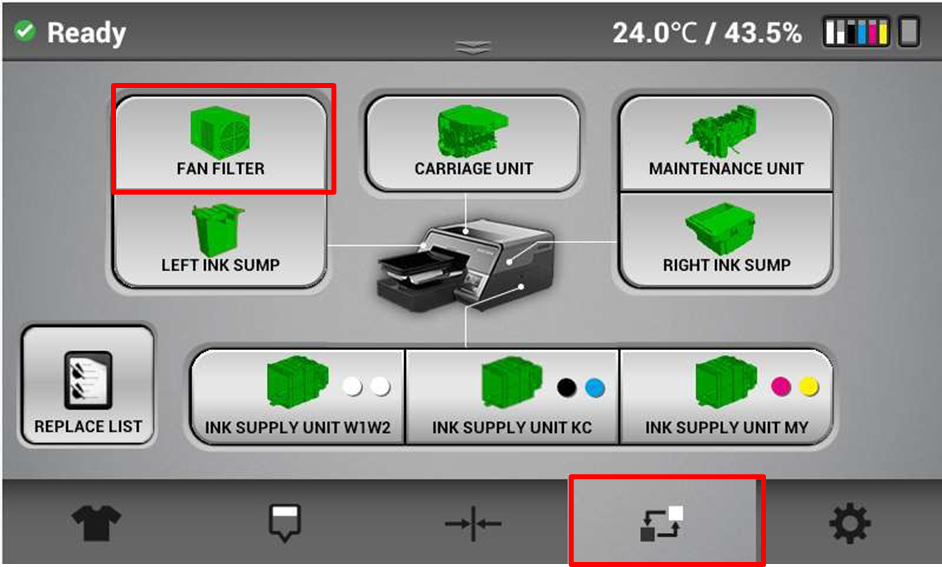
11. Go to the parts consumables tab
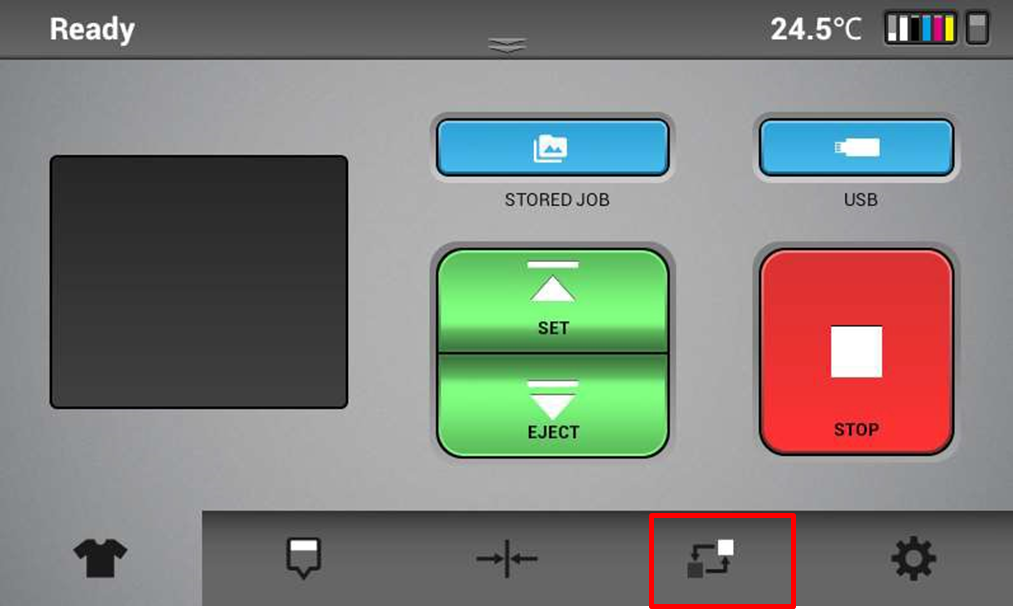
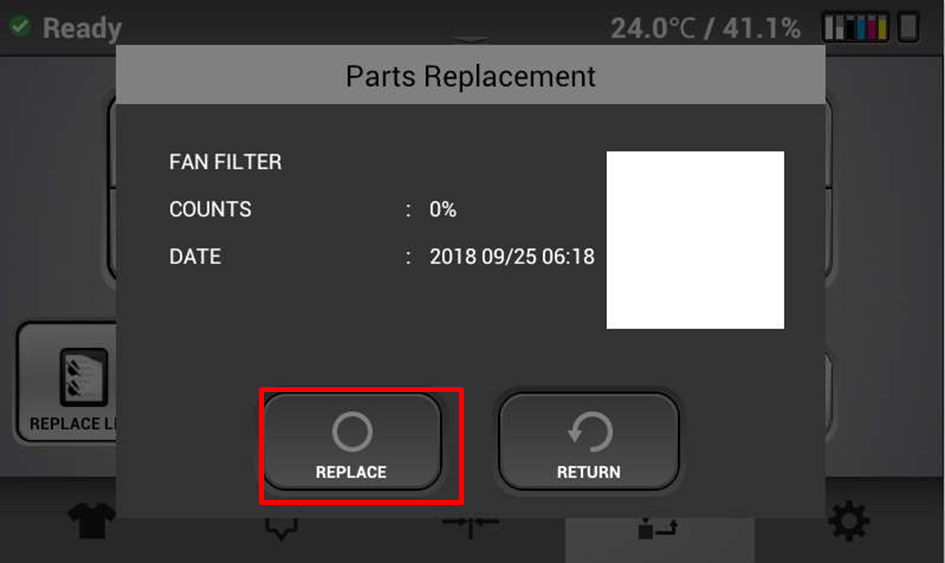
12. Select "FAN FILTER"
13. Select Replace
BONUS TIP: Contact our Technical Support team whenever you have questions about your machine, we're here to help!
Technical Support can be reached by phone at 1-877-626-2538 Ext. 2, or by email at Tech1@ricohdtg.com.
Business hours are Monday - Friday, 6:00 AM - 5:00 PM Pacific