-
DTG University
-
Printers
-
-
-
- Daily Maintenance for Ri 1000
- Weekly Maintenance for Ri 1000
- Weekly Maintenance for Ri 1000: Head Cleaning Jig
- Monthly Maintenance for Ri 1000
- Video: Replace Encoder Strip
- Video: Replace Left Ink Sump Tank
- Video: Replace Right Ink Sump Tank
- Video: Replace Maintenance Unit
- Video: Replace W1-W2 Ink Supply Units
- Video: Ri 1000 Carriage Replacement
-
-
- How to Connect the Ri 100 to Wireless LAN
- Rh 100 Finisher Operating Instructions
- Rh 100 Finisher Quick Guide
- Ri 100 Installation Guide
- Ri 100 Maintenance Guide
- Ri 100 Operating Instructions
- Ri 100 Quick Guide
- Ri 100 Safety Information
- Ri 100 Setup & Installation
- Ricoh DTG University for Ri 100
- Get Started With Your New RICOH Ri 100
-
-
-
- Application error on startup
- Black Screen
- Colors are wrong or missing
- Head Voltage Error
- Home Carriage Timeout
- Home Table Timeout
- Ink Cartridge Check
- Laser warnings?
- Not printing anything
- Obstruction detection
- Obstruction Sensor Triggered
- Platform didn't lower
- Platform Error
- Print engine not on
- Print Head Calibration failed
- Print is faint or has gaps
- Print Nozzle Clogging
- Prints blurry or smeared
- Video: White ink maintenance & Troubleshooting
- Show all articles ( 4 ) Collapse Articles
-
-
-
Software
-
- Adjusting white underbase
- AnaRIP - Dark Garments
- AnaRIP - Light Garments
- AnaRIP Download
- AnaRIP Hot Folders
- AnaRIP input file handling
- AnaRIP Output
- AnaRIP requirements
- AnaRIP supported file types
- AnaRIP Templates
- AnaRIP View Types
- Calculating cost per print?
- Choke adjustment
- Color contrast adjustment
- How do I enable white ink?
- Image opacity
- Importing graphics into AnaRIP
- Installing AnaRIP
- Managing color profiles in AnaRIP
- Printing too slowly
- Video: Using AnaRIP
- What Is AnaRIP?
- White Highlight Preview in AnaRIP
- Show all articles ( 8 ) Collapse Articles
Powering Up
IMPORTANT! – If this is the first time you are starting up a new printer, please refer to the detailed procedures in the User Manual,Chapter 2: Start Up of a New Printer. Do NOT Turn the printer on until you have removed the 2 shipping brackets.
The power up sequence consists of two power switches.
First turn on the main power switch on the rear of the printer. It powers the printers power supply control board.
Next press the large circular button on the right side of the Control Panel to turn on the printer. This fully powers up the print engine and initiates the power up sequence.
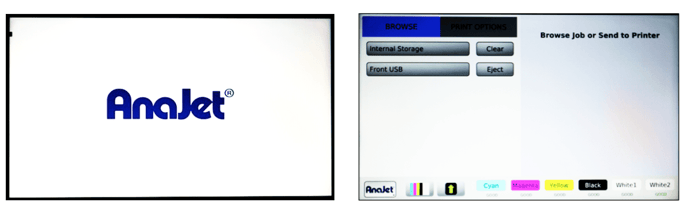
A splash screen will appear on the display showing the AnaJet logo and the power up sequence will begin.
The Print Table will move forward to the Load Position.
When the power up sequence is properly completed, the following display will show in the LCD.