-
DTG University
-
Printers
-
-
-
- Daily Maintenance for Ri 1000
- Weekly Maintenance for Ri 1000
- Weekly Maintenance for Ri 1000: Head Cleaning Jig
- Monthly Maintenance for Ri 1000
- Video: Replace Encoder Strip
- Video: Replace Left Ink Sump Tank
- Video: Replace Right Ink Sump Tank
- Video: Replace Maintenance Unit
- Video: Replace W1-W2 Ink Supply Units
- Video: Ri 1000 Carriage Replacement
-
-
- How to Connect the Ri 100 to Wireless LAN
- Rh 100 Finisher Operating Instructions
- Rh 100 Finisher Quick Guide
- Ri 100 Installation Guide
- Ri 100 Maintenance Guide
- Ri 100 Operating Instructions
- Ri 100 Quick Guide
- Ri 100 Safety Information
- Ri 100 Setup & Installation
- Ricoh DTG University for Ri 100
- Get Started With Your New RICOH Ri 100
-
-
-
- Application error on startup
- Black Screen
- Colors are wrong or missing
- Head Voltage Error
- Home Carriage Timeout
- Home Table Timeout
- Ink Cartridge Check
- Laser warnings?
- Not printing anything
- Obstruction detection
- Obstruction Sensor Triggered
- Platform didn't lower
- Platform Error
- Print engine not on
- Print Head Calibration failed
- Print is faint or has gaps
- Print Nozzle Clogging
- Prints blurry or smeared
- Video: White ink maintenance & Troubleshooting
- Show all articles ( 4 ) Collapse Articles
-
-
-
Software
-
- Adjusting white underbase
- AnaRIP - Dark Garments
- AnaRIP - Light Garments
- AnaRIP Download
- AnaRIP Hot Folders
- AnaRIP input file handling
- AnaRIP Output
- AnaRIP requirements
- AnaRIP supported file types
- AnaRIP Templates
- AnaRIP View Types
- Calculating cost per print?
- Choke adjustment
- Color contrast adjustment
- How do I enable white ink?
- Image opacity
- Importing graphics into AnaRIP
- Installing AnaRIP
- Managing color profiles in AnaRIP
- Printing too slowly
- Video: Using AnaRIP
- What Is AnaRIP?
- White Highlight Preview in AnaRIP
- Show all articles ( 8 ) Collapse Articles
Adding Printers to Data Collector – Ri 1000
Before proceeding, please ensure that you are running Firmware Ver.01.07-02 or later. Refer to Chapter 9 of the user manual for instructions on updating firmware.
1. Open the Data Collector Settings Application by clicking on icon (or link below)
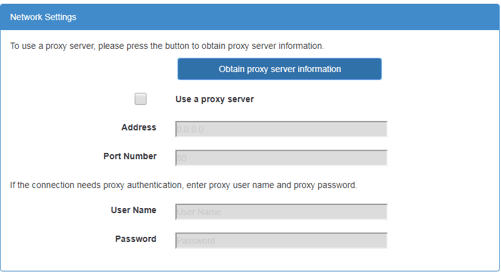
2. The above Shortcut/Link will open a browser window with the Data Collector settings. Enter information of Proxy server as needed. (This in not needed for most applications and can be skipped)
3. Obtain your Printer’s IP address by following these steps:
4. Go to the settings cog on the RICOH Ri 1000 printer control panel
5. Select OPTION under the settings tab
6. Select the IP ADDRESS option in the menu dialogue box
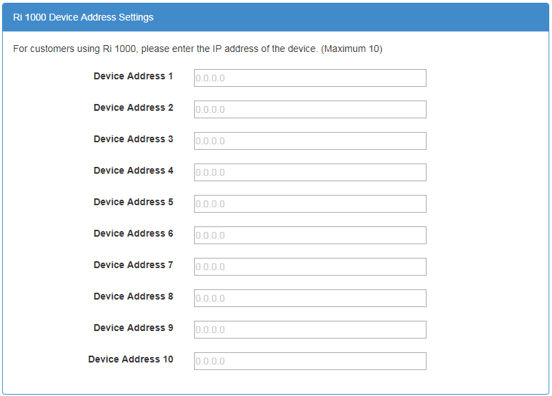
7. Make note of your IP Address and enter into the Device Address Settings. IP Addresses should be entered in the following format: (XXX.XXX.XXX.XXX). You may add up to 10 printers.
8. Enter your email address to complete the activation process.
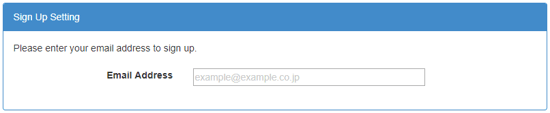
9. Click SIGN UP to complete the activation process
10. Once complete, you will receive an email from no-reply@supervisori.ricoh.com confirming your registration and instruction for how to log into your new printer dashboard.